How to Replace a Windshield in 12 Simple Steps
If you have ever had to replace a windshield, then you know it can be expensive. Not only is the cost of replacing a windshield high, but the process of doing so can be difficult if you don’t know what you are doing. With that said, we want to give some tips on how to replace a windshield at home!
Of course, if you are not sure what to do, seek help from technicians that are AGSC certified to get the job done right. Always, check with your insurance provider to see how much you are covered for windshield replacement.
However, if you have time and enough interest to replace a windshield yourself. Follow this article.
Advanced Driver Assistance Systems (ADAS)
If your car is supported with ADAS like collision avoidance, you will need to disintegrate these tools. However, it’s best to have them calibrated by an expert after the replacement.
Tools
The first thing that we recommend is purchasing all of the necessary tools and supplies needed for this job ahead of time. You will need an auto glass kit from your local hardware store in order to complete this task – make sure that your kit comes with instructions before attempting anything else!
Of course, you should also have a few tools handy when it comes to replacing your windshield. These include hand tools, screwdrivers, gloves, masking tape, a thin blade, a caulk gun and microfiber cloths.
Step by Step Instructions on How to Replace a Windshield
#1 Remove the Rear Mirror
First off you must remove anything that is obstructing the removal of the old windshield including the rearview mirrors, floor mats or plastic panels from around the dashboard.
#2 Remove the Wiper Blades and Windshield Gasket
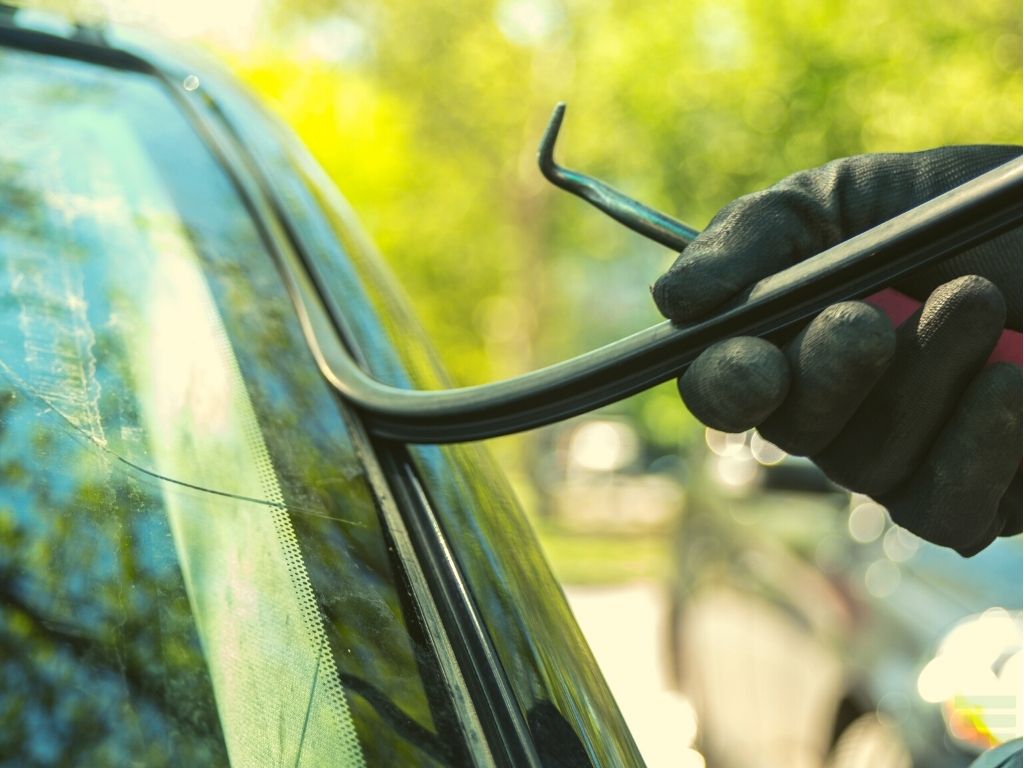
The next step is removing any molding that was put around your window perimeter when it was installed in order to seal the edges of the glass. Remove all this carefully so as not to damage anything.
#3 Separating the Windshield
A cold knife or razor are two of the tools you can use to cut away any silicon that is holding your windshield in place.
Then carefully pull it out and set it aside, being careful not to scratch anything with its edges that may still be sharp from installation. Take a moment now to clean up the area because this will make for
#4 Cutting the Urethane Seal
The next step is to cut the urethane seal around the perimeter of your windshield and remove it. This can be done with a razor or cold knife, but you’ll want to take care not to scratch anything in that area while doing so. You should have already removed any molding that was applied when installing your window.
#5 Removing the Old Windshield
Now that you have the seal removed, it’s time to remove your old windshield. This is done by prying out the molding with a flat-head screwdriver and removing any nails or screws if there are any.
Be careful while removing the window to not to damage the paint or other surfaces.
Remove any excess sealant with liberal amounts of alcohol and then wipe down the area thoroughly before installing your new, durable windshield. You can also use a razor blade to make sure there are no leftover bits or pieces of debris from the installation that may cause problems going forward.
#6 Clean the Perimeter of the New Windshield
You can apply glass cleaner to do so.
#7 Applying Urethane Around the Perimeter
You can use a caulking gun or other adhesive-sealing tool to do so.
This is done by applying a continuous and even bead of urethane around the perimeter of the windshield frame that lines up with any holes in it, e.g., for attachment to an AC unit on one side and ventilation slats from the vehicle.
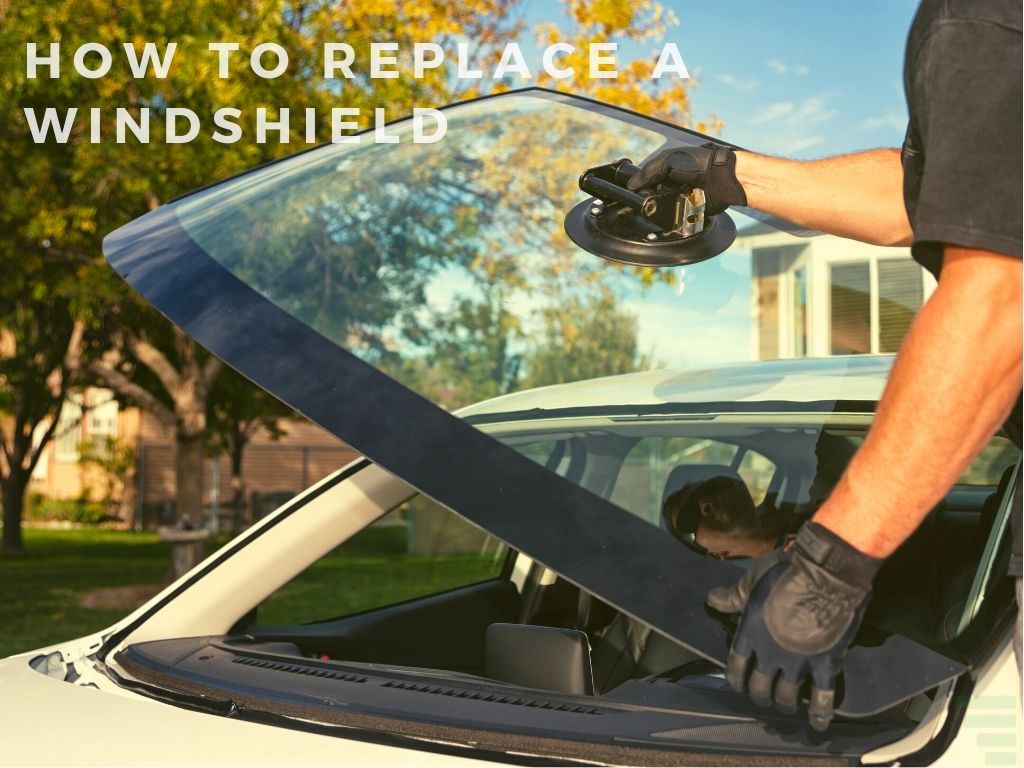
#8 Installing the New Windshield
You should install the new windshield as soon as possible after laying the urethane to avoid wavy lines, blisters and other problems that may cause you headaches down the line.
Be careful when putting the new windshield into place. You can seek help from a friend or use suction cup window holders.
#9 Positioning
Position the new windshield and adjust if needed to get to the right spot.
#10 Holding New Windshield in Place
Use the tape to hold it in place and prevent rubbing that would otherwise happen while curing.
#11 Let the Urethane Sit
Remember to check the instruction to see how much time it is needed for the urethane cure.
#12 Reinstalling Rearview Mirror
Now reinstall everything you took off from step 1 to finish the process.
Conclusion
Having a perfect windshield is important as it protects everyone in the car. If it got cracked or small chips, you can fix these yourself. However, if you need to replace it for some reason, do it as your first priority. Follow our instructions in this blog to get this right. The DIY process is not difficult at all.
source https://automotivegearz.com/how-to-replace-a-windshield/
Comments
Post a Comment